Apple

Calibrating my iPad Pro for Photography

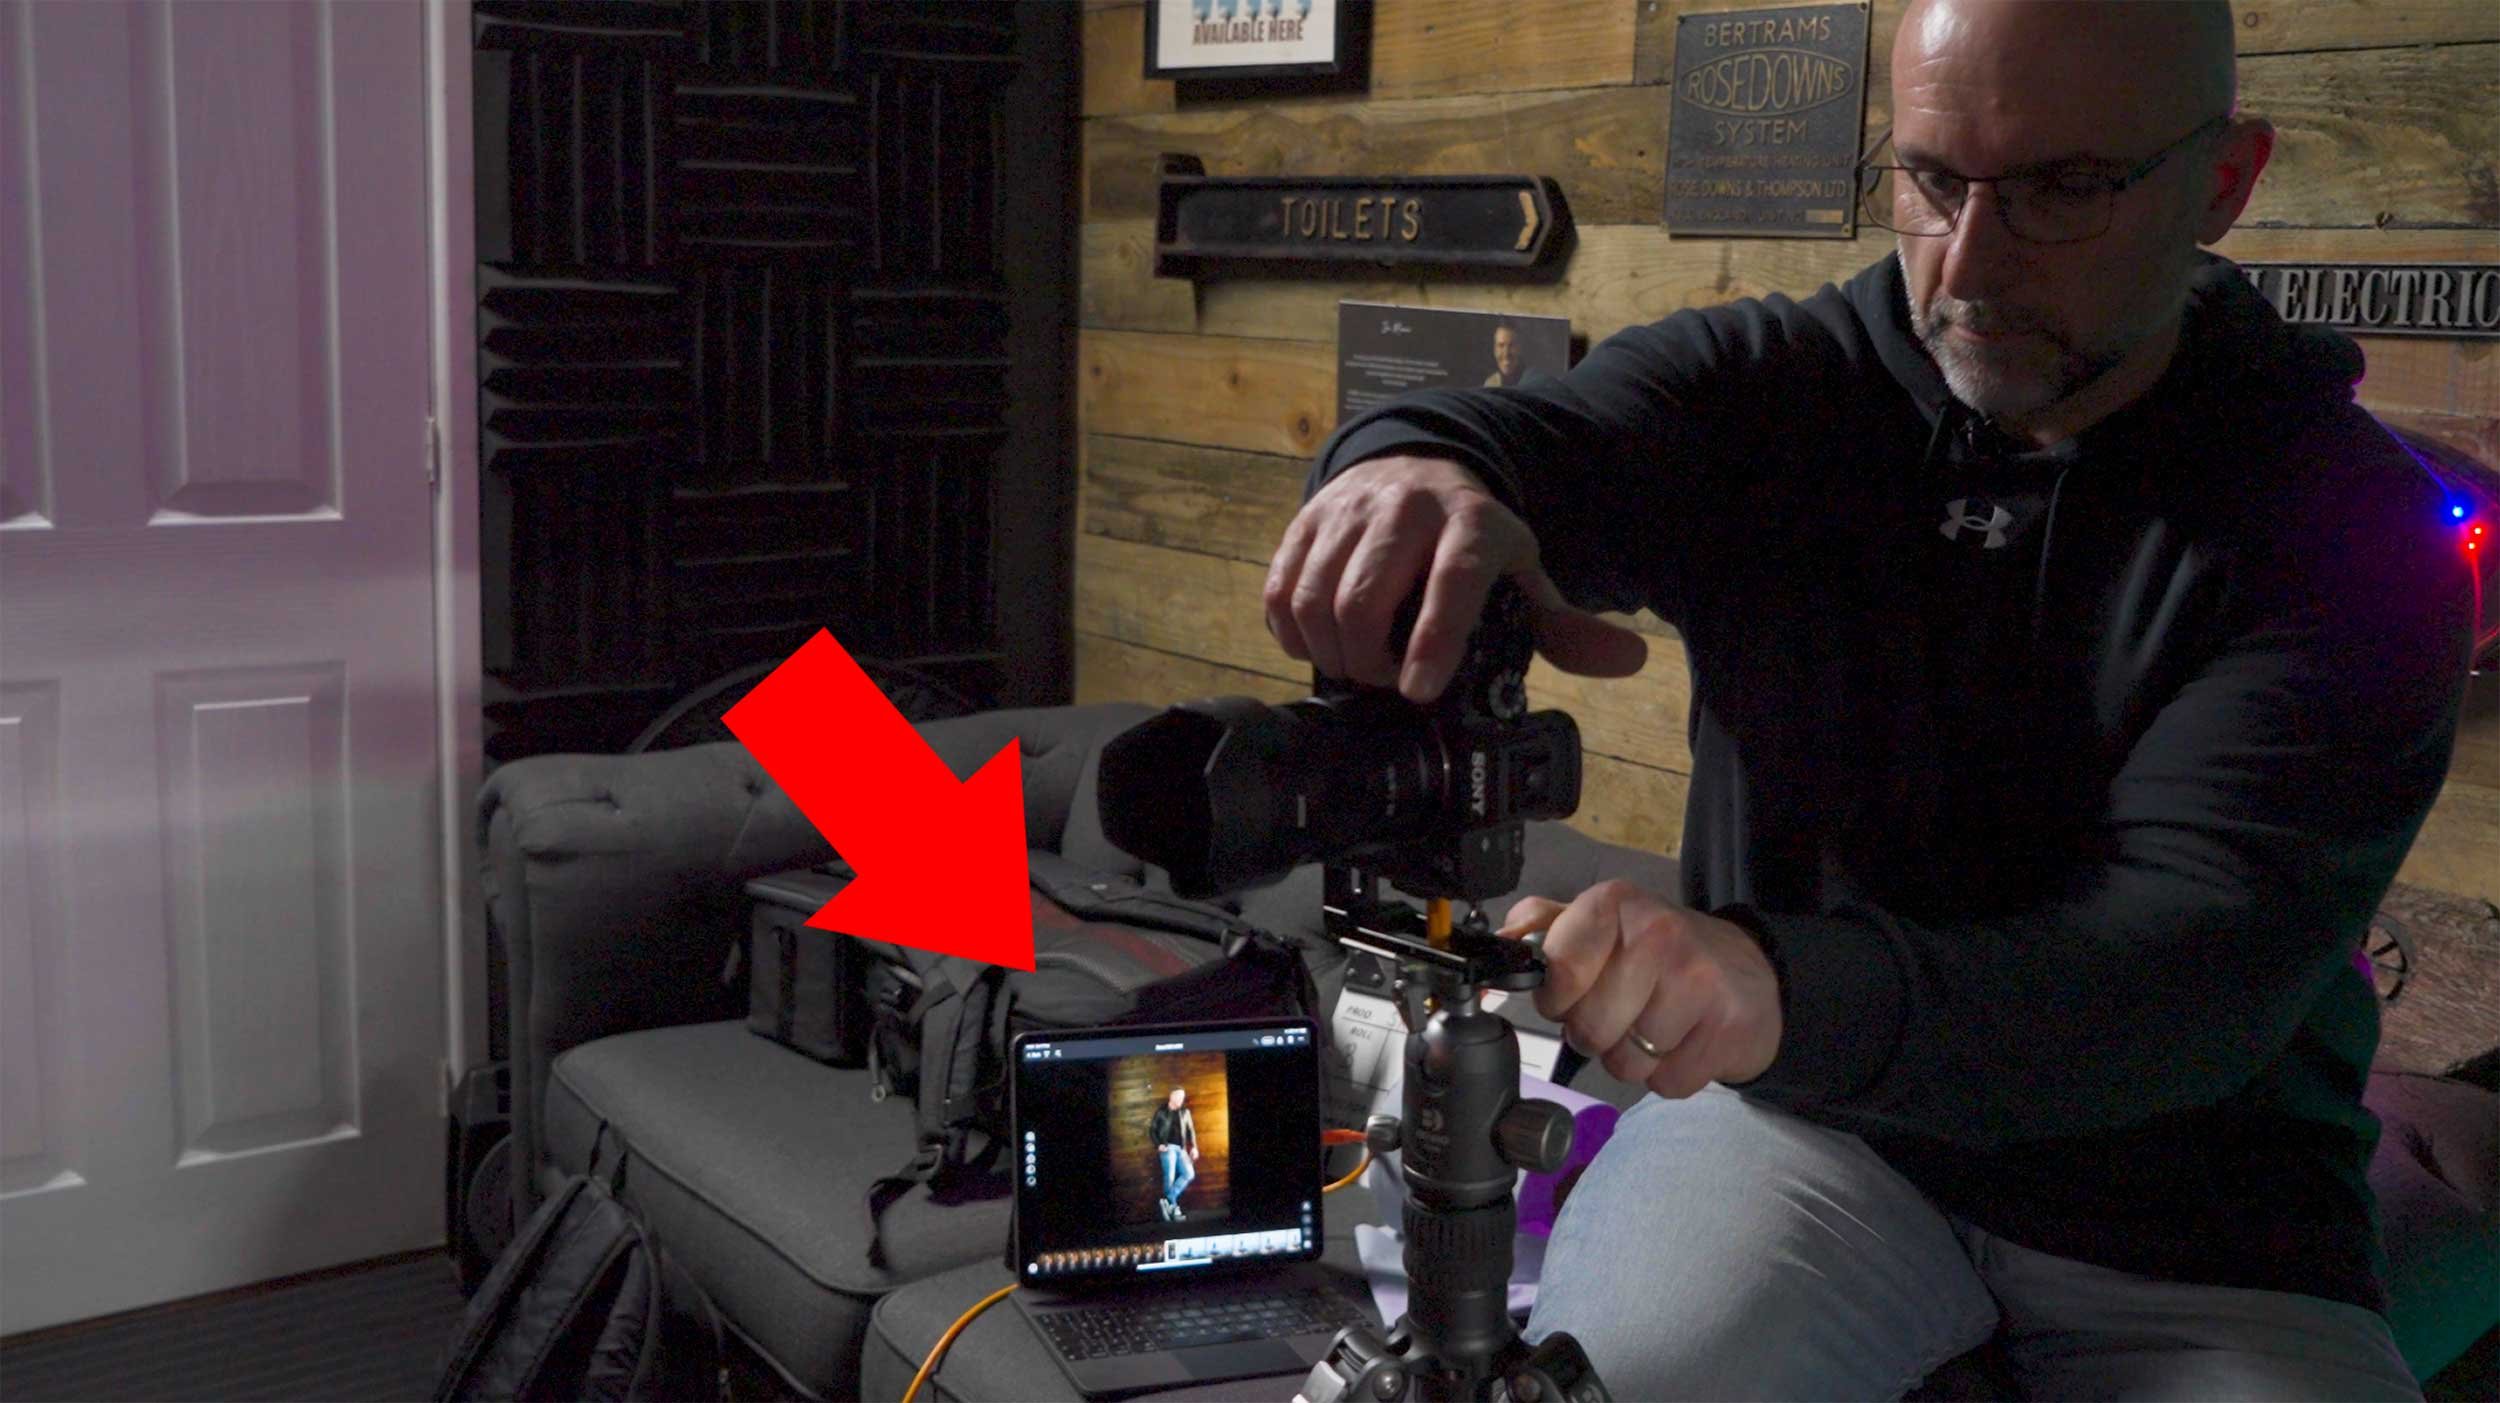
One thing I always do when taking portraits is shoot tethered and that always used to be with my camera connected to my MacBook Pro or laptop BUT that has now changed to being my iPad because its way more portable and convenient.

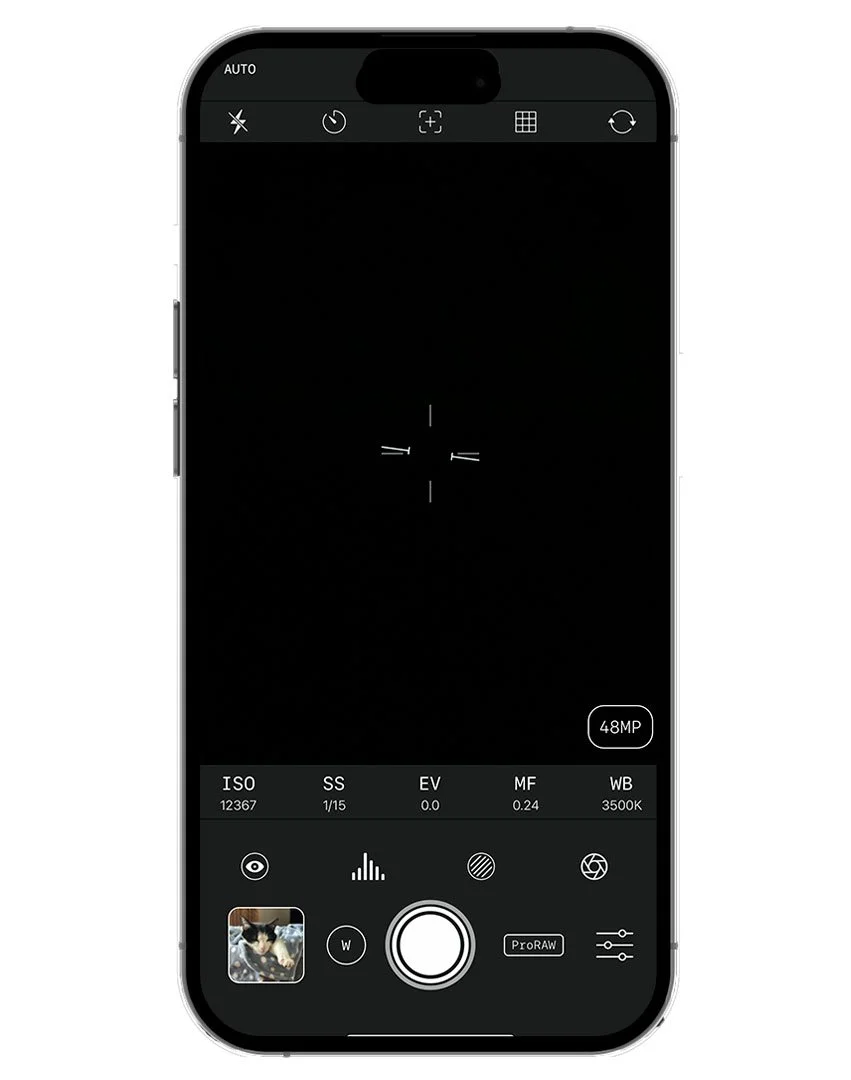
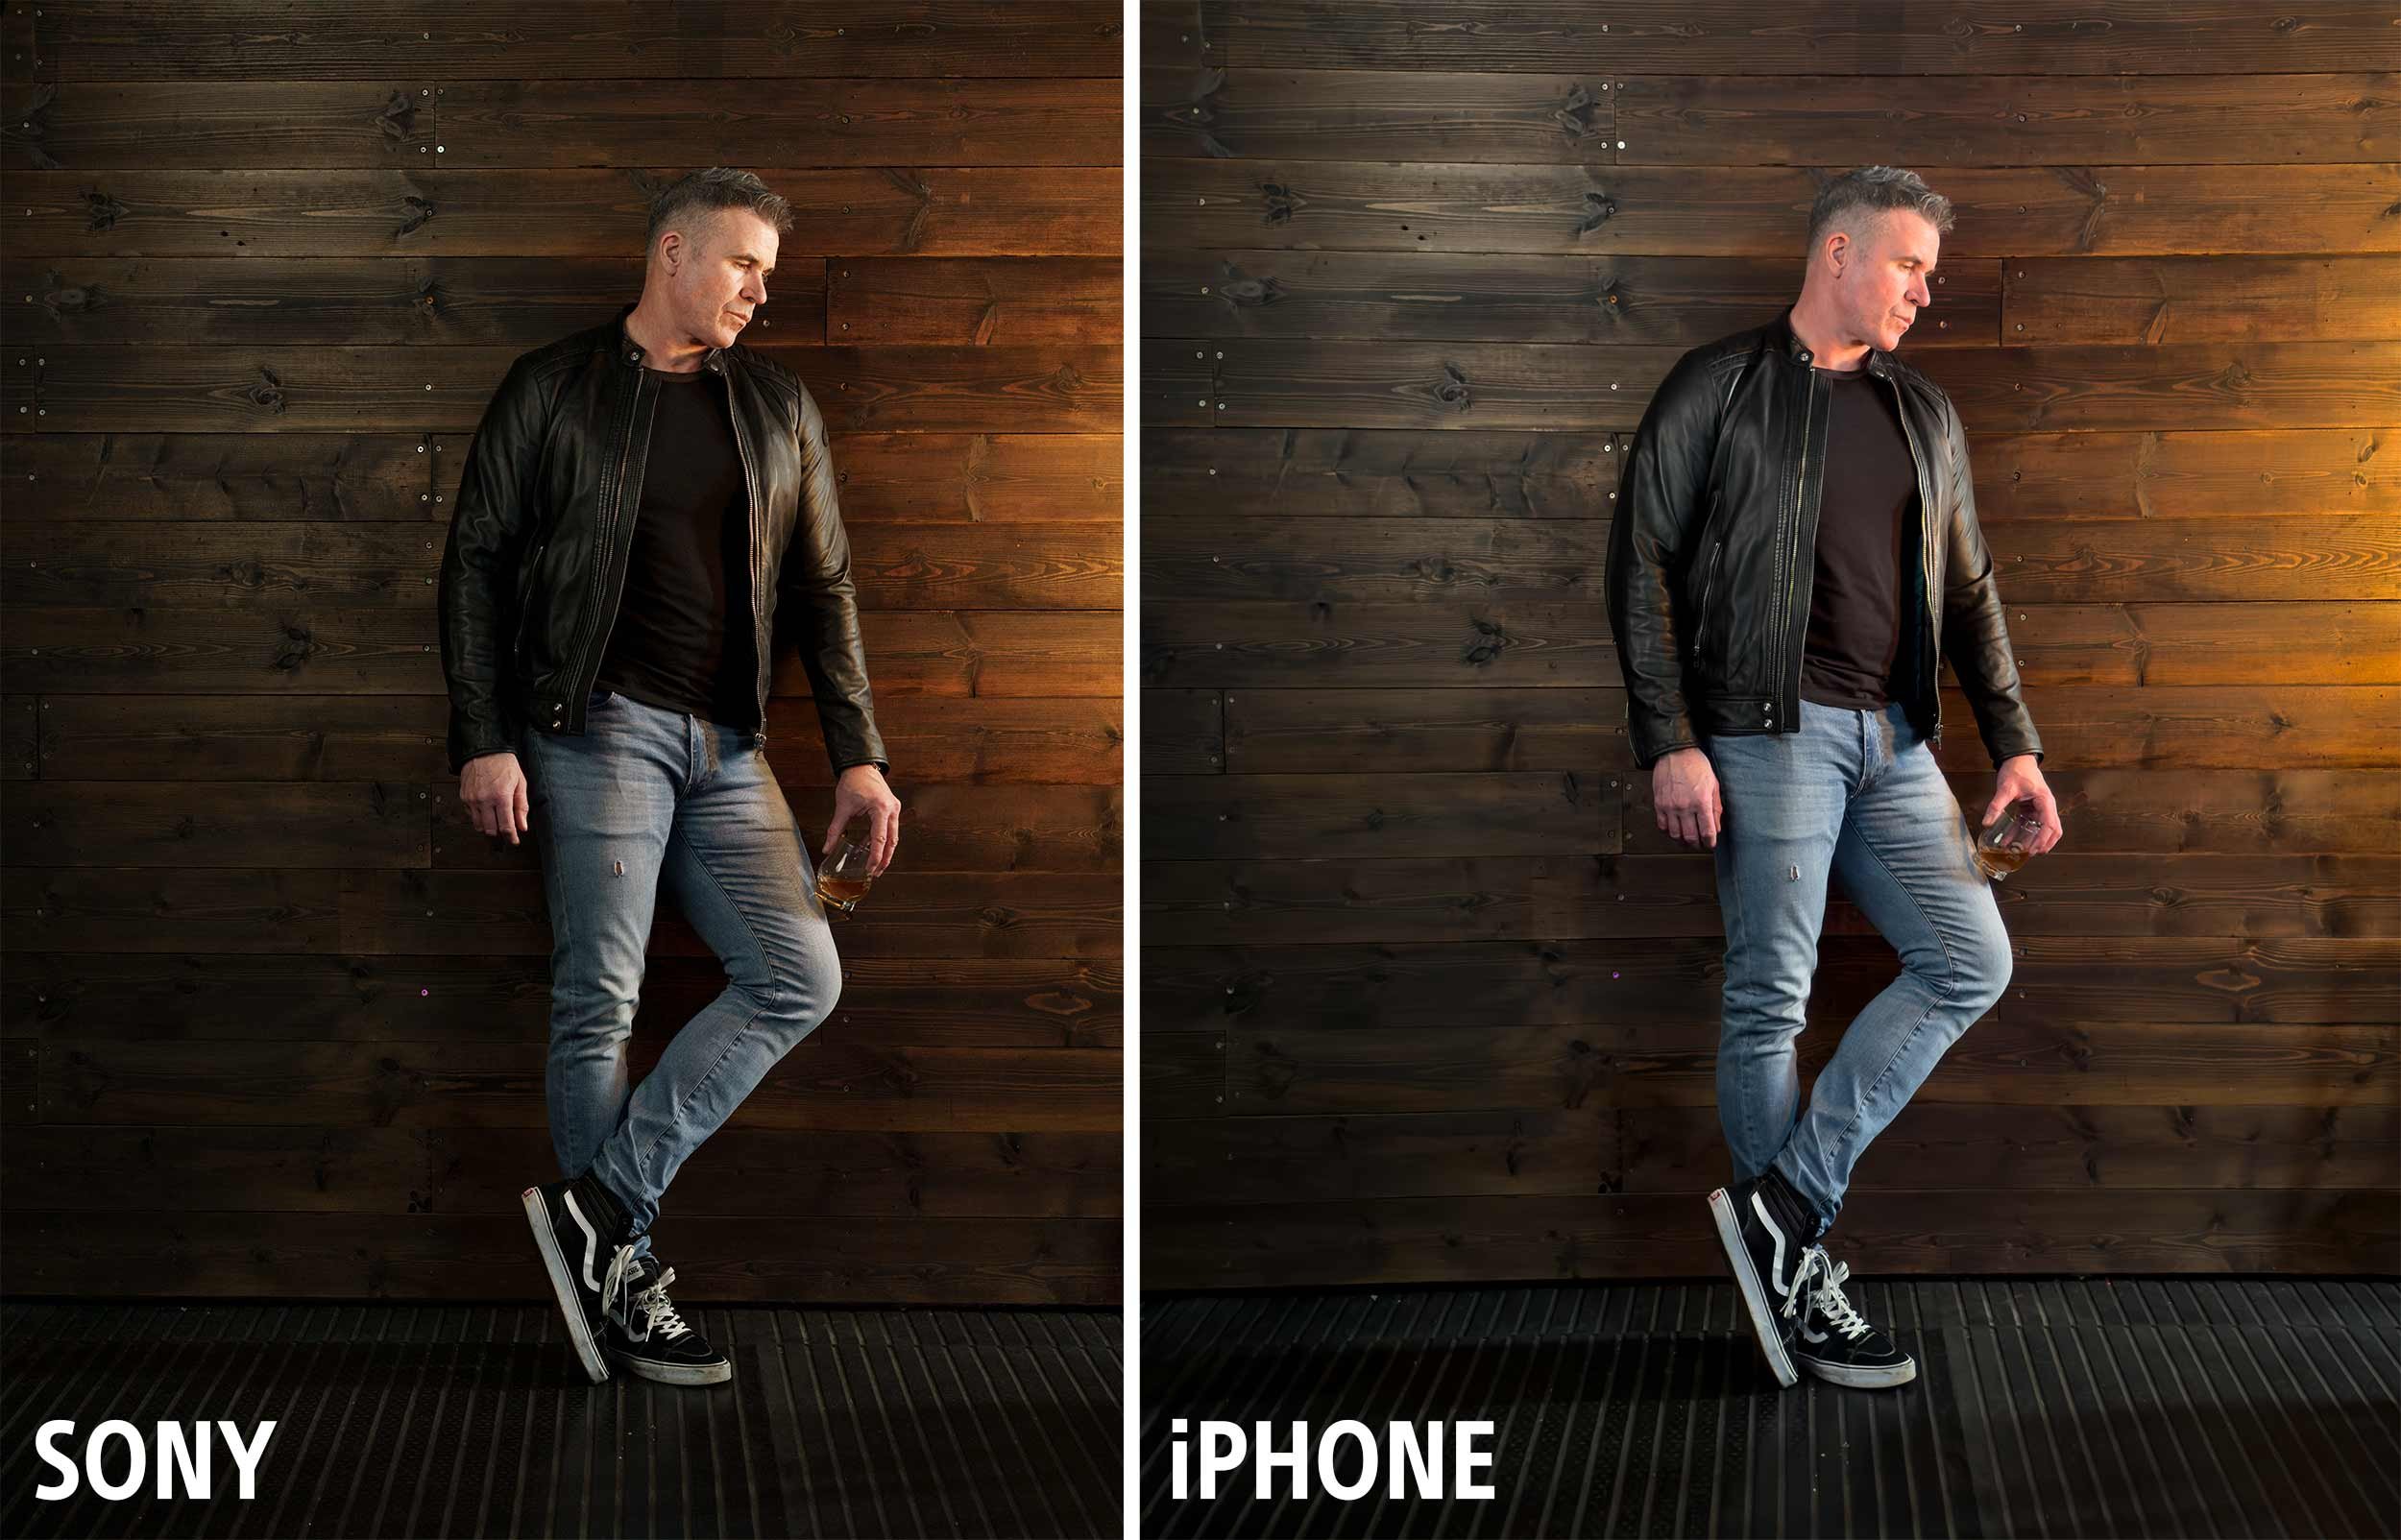
I use the CaptureOne app for the tethering which works so incredibly well .. literally just open the app, plug in your camera (you can also use it wirelessly) and you’re up and running. You can even use it to tether to your iPhone … if you have one.

The only problem i find is that the screen on the iPad out of the box is too contrasty … its set up so that it gives the richest colours and the deepest blacks for when using apps, watching movies, playing games, looking at pictures which is great but not ideal for when using it when tethering.

However I have the 6th generation 12.9” iPad Pro running iOS 17.3.1 and this has Reference mode and this we can use to kind of calibrate the screen to something more suitable for photography.

NOTE:
Reference mode is actually available on 12” iPad Pro 5th generation or later and requires iOS 16 or later.

Constant LED Light Portraits with Sony and iPhone

The more I use the LED Constant Light for Portraits, the more I fall in love with it.

I know I said it before in an earlier post but when you use it, the whole WYSIWYG (What You See Is What You Get) not only makes setting up so much easier and quicker but also every time I use it, the people I photograph say how much more relaxing it is not having a flash go off in their face.

Just over a week ago I was recording some content for the iPhone Photography Conference and thought it would be an interesting comparison just to see how close I could get a photograph I took with my main camera, my Sony A7RIV Mirrorless and my iPhone 15 Pro Max.

Of course I went into this knowing that the iPhone image wouldn’t equal or surpass the quality of my Sony, but just thought it would be interesting to see how far the quality has moved on and do this with a lit Portrait using the constant light … the Westcott L60-B Bi-Colour LED.

THE SET UP

For the lighting. I had originally planned to use just one light, the L60-B, however I couldn’t resist the warm light emitting from the heater that Ian had turned on in the studio. I loved the way it cast a warm glow onto the wood panelling so this was carefully raised off the ground and then became the main light and the L60-B was positioned on the opposite side of Ian further forward and higher up.

The L60-B was given a warmer temperature using the iPhone app which works incredibly well.

As soon as I opened the app it connected to the light and I was able to dial in the power settings, change the temperature and I could even make it perform lighting special effects like lightning, TV and a faulty bulb … but these are obviously for use when doing video.

CAMERA SET UP 

So with my Sony A7RIV on my tripod I used my 55mm Zeiss f/4.0 lens and tethered this into CaptureOne on my iPad, which works an absolute treat!

It’s incredibly easy to set up; you literally plug one end of a USB-C cable into the camera, the other end into the iPad, and with the app open i’st connected and ready to go.

I’m using this all the time now when tethering and what I also love about it is that you can stop and start the monthly subscription whenever you want. The subscription is only £4.49 / month so I tend to look at what I have planned and just restart it for that period, then cancel it again.

The only thing I don’t like which might (I hope) be just down to a setting I’ve missed turning on, but the photographs you take are only stored on the iPad. I only discovered this after the first shoot I did using it. I disconnected the camera and went to check the images on the camera and nothing was there. Only once my heart re-started and I looked on my iPad did I realise where they were 😳


CAMERA SETTINGS

The settings dialled into my camera were …

  • f/4.0

  • 1/60 sec

  • 2000 ISO … which for modern day cameras is nothing

using the iphone

Having taken the portrait with my Sony I then swapped over to my iPhone which was placed on the tripod using the ULANZI ST-27 Phone Mount.

I also attached the 2x Telephoto lens from ReeFlex to the 1x lens on my iPhone using one of their cases that has threads in each of the lens apertures.

The 1x lens is the equivalent of 24mm and is the only lens on the iPhone capable of shooting in ApplePro Raw at 48MP … the highest resolution and largest file my iPhone 15 Pro Max can produce.

With the 2x Telephoto lens attached this made the 1x lens the equivalent of 48mm and did this optically rather than digitally, and so doing everything possible to create the best possible file; not quite 55mm but the closest I could get oto it optically.

iPHONE PRO CAMER APP

To take the photograph with my iPhone I used a Pro Camera App from ReeFlex and called ReeFlex.

This app like most other pro camera apps gives you control over extra settings like Shutter Speed and ISO but it also makes it very clear to see not only what file format you are in but also the resolution.

ReeFlex Pro Camera App usinfg 1x lens in Apple ProRaw at 48MP

However here’s the catch …

If when you’re using the 1x lens in Apple ProRaw at 48MP you make changes to the shutter speed and / or ISO then the file size immediately drops from 48MP to 12MP.

ReeFlex Pro Camera App using 1x lens with Shutter Speed Adjusted

So because of this I opted to leave the iPhone in the AUTO settings which kept the 1x lens in Apple ProRaw at 48MP, and these are the out of camera and out of phone results, with the Sony image on the left and the iPhone image on the right …

Now at this 100% magnification the iPhone file, although different to the Sony file, certainly looks to be holding up.

However, it’s when you zoom in on that iPhone file that things look VERY different …

Look how the file looks soft and slightly out of focus. Look how the file lacks texture and detail in Ian’s skin, his hair and the wood panelling.

Apple ProRaw

This softening appearance to the image is all because of shooting in the supposed highest resolution settings, AppleProRaw at 48MP and that’s because Apple ProRaw isn’t like a traditional Raw file as we know and understand them.

You see Apple ProRaw files do actually receive some processing such as Noise Reduction ( quite al lot ) and Smart HDR, so the file we end up with is also a blend of a number of images at different exposures taken and processed increibly quickly.

So not REALLY a Raw file as you would expect 🤷‍♂️

topaz sharpen ai

Running the file thorugh Topaz Sharpen AI does recover alot of that lost detail as you can see here …

However knowing what Apple ProRaw does to your files does arm you with a bit of knowledge so that you can make the decision to use it or not.

Depending on how serious you are about your iPhone photography you might want to consider shooting in 12MP Raw which Pro Camera apps like Moment and ReeFlex allow you to do …

Naturally we always want the highest resolution file possible but the noise reduction that Apple ProRaw does, might make you reconsider.

12MP Bayer raw files

Currently ALL Raw Long Exposure apps produce 12MP Bayer Raw files and that’s what all of my seascape images are and I’m more than happy with them.

Sure more resolution would be good but until that time, these 12MP Bayer Raw files are very acceptable …

So acceptable in fact that Digitalab even printed one of my iPhone seascapes at 72” on the longest side and it looked incredible …

final retouched portraits

Here though are the final retouched portraits with the Sony file on the left and the iPhone file on the right, and yeah the Sony file is definitely better and that’s to be expected, but looking at the iPhone file the future is going to be VERY interesting indeed!

wrapping up

So more testing to be done which will be interesting as new iOS updates come along and the iPhone 16 later this year.

In the mean time I’m going to carry on taking seascapes with my iPhone because I really enjoy doing them BUT I’ll also be taking them with my Sony too.

As for Portraits I’ll keep taking them with my iPhone but only as an extra bit of fun and experimentation when taking them with my Sony.

Catch you next time
Glyn


HOW I EDIT theseiPhone Photographs in Lightroom

This is a recorsing of a LIVE Stream that I hosted on YouTube and Facebook on Sunday 29th October 2023 …

Join me for this LIVE stream as I go through the editing step sin Lightroom of some iPhone Portrait and Seascape photographs taken during a recent North Wales Road Trip …

***NOTE: The LIVE Feed cut off moments before the end of the broadcast however all relevant content was covered and all mentioned links are in the video description

My ULTIMATE Desktop Set Up for Photography, Content and Zoom ( YouTube LIVE )

I'm often asked about the kit / hardware I use every day for photography , content and live streaming so in this video I'll go through the lot; EVERYTHING I use that makes editing (photography& video) and streaming so much easier.

You can see all of the kit I go through over on my GEAR page.

My NEW Desktop / Workspace Set Up for Photography , Content and LIVE Streaming

Moving house recently was a great excuse for a revamp of my workspace with also now having a new bespoke made desk from my friend Mark Baber.

I often get asked about what computer I use and what monitor / display, so with a few new additions including a 2nd display and new acoustic panels, this is what I’m working iwith day to day and never lets me down …

COMPUTER

Midway through last year my turbo charged iMac unexpectedly died on me. Nothing and no-one could bring it back to life. 

Thankfully this wasn’t an inconvenience as opposed to a disaster because nothing is stored on it other than the software I use … and all of that is easily installed again as it’s all held online. All my files (video, photo etc) are all stored on an external hard drive system and a number of cloud based services too.

Before the iMac was no more, for some time I had been looking into the M1 Apple Studio and had couldn’t decide to go for either the Max or the Ultra … and then there was question of what upgrades to go for.

However due to the iMac’s demise being all of a sudden, I couldn’t wait for an upgrade … I needed something straight away so ended up going to a local Apple Store and picking up an ‘off the shelf’ spec M1 Mac Studio Ultra and I have to admit I’m so glad it worked out this way.


I do A LOT of video editing, photo editing and motion graphics and not once has the Apple M1 Studio missed a beat or left me waiting. It works a treat. It’s fast and it’s silent. Unlike some folks saying they experience a high pitch noise, I wouldn’t know mine was on if i didn’t look at the displays I have connected into it.

Displays

The NEW and my latest display is the SW 272U from BenQ.

27” display, 4K , 90W USB-C Photographer Monitor / Display. 99% Adobe RGB, Fine Coating Panel with TUB Anti Relfection (which works an absolute treat) , Wireless Hot Key Puk and a whole lot more.

This is my workhorse and what I use for ALL photography / image editing. Colours are absolutely spot on! The included shade works great along with the anti relfection screen meaning no matter what angle or lighting conditions, you still see the colours, contrast and details as they should be. The position of the SD Card slot makes it extremely easy and convenient to use, the wireless Hot Key Puk is being used more than any other puk I’ve had with previous model displays and the faux leather material on the base, although it might not seem like a bigge, makes a huge difference being able to store / rest items on it as they no longer slide off.

BenQ SW272U

My 2nd disdplay is the BenQ PD3420Q which is an ultra wide 34” 21:9 display.

So much I could say about this but just for starters it’s Mac Ready, 100% sRGB and 97% P3 Colour Space with IPS Technology and much more.

This thing is my ‘everything except photography’ workhorse. I use it for video editing, live streaming, the occasional bit of gaming, writing, browsing the net, watching Netflix … it’s an all-round creative display that also happens to look great too.

BenQ PD3420Q

Using this as a 2nd display couldn’t be simpler; I just connect a USB-C cable from my SW321C into it and that’s it…done!

•On the subject of displays, as an AQColor Ambassador I am able to help with the purchase price of a new display in the SW or PD range.

If you’d like to know more just drop me a message using the form on my CONTACT page or Direct Message me on social media (Fcebook , Instagram , Twitter )

*NOTE … If you’re thinking of investing in a BenQ Display, as an Ambassador I’m in the fortunate position to be able to help out withe the cost so if you’d like to know more, feel free to get in touch using my CONTACT page.


lighting

The main video light I use is from Westcott … the Flex Cine 1’ x 1’ which includes a flexible LED mat, dimmer, AC power adapter, grip head, yoke mount, Scrim Jim Cine frame, and hard diffusion panel. This entire 1-light setup packs neatly in the provided travel bag.


printer (PHOTOGRAPHY)

I absolutelty LOVE this printer … the Canon imagePROGRAF Pro 300

With my BenQ SW321C display correctly calibrated and using the ICC Profiles for the paper I use, every single print that comes off this thing is on the money be it colour or black and white. Simply stunning!


PRINTER (EVERYTHING ELSE)

The printer I use for everything else is the Canon PIXMA TS3450. Small, light and just works! Very quick and easy to set up sand the printing speed and quality is great. Veey happy with it. Nothing more to say 😃


storage

How I store files and backup has changed so many times over the years but never has it been so streamlined as it is now.

I use one 8TB G Tech Unit and this is where all my files (photo / video) are stored and this is backed up each and every day to Backblaze, Dropbox and Amazon as is my main computer .. but other than software there’s very little I store on that.

I also use two Sandisk Professional G-Drive SSD (I TB each) … one that holds my Lightroom Catalog (which is also backed up each day) and the other is used as Time Machine.


UPS

Uninterruptable Power Supply … I wouldn’t / couldn’t work without this! Living as we did in the countryside the amount of power cuts and surges was astounding but this unit didn’t miss a beat and just kept everytihng running until the power came back on, which at one point was over 10 minutes. Any longer than that and the UPS is able to close down the computer safely.


APC by Schneider Electric Back-UPS BX - BX1400UI - Uninterruptible Power Supply

If you don’t have one, I HIGHLY recommend you consider investing in a unit.


CAMERA / Webcam

Damn, I LOVE this camera!

The Sony ZV-E1 is basically a shrunken down (and twice the price) Sony FX3!

Full Frame, 4K 120fps, insanely good in-body image stabilisation, fabulous image quality and Subject Recognition and A.I. Focus Tracking that is incredible!

I got this first and foremost for filming content whilst out and about, but this thing works so good as a webcam too. With it being a small form factor, unlike the FX3 it doesn’t have an internal fan, but this is no problem at all when using as a webcam if you use a ‘dummy battery becuase then it will just keep on going and going. ALWAYS gets a comment when I’m doing a LIVE broadcast!


Microphone

The RØDE NT1 (5th Generation) … Can’t go wrong with RØDE so after a few years of using a different brand, I was drawn back when this updated model was released.

Studio / Broadcast quality. Does what it says on the tin and no wonder the NT1 has become the industry standard over the years!


AUDIO INTERFACE

The RØDE RØDECaster Duo

Originally I used a simple audio interface for connecting the XLR cable from previous microphone, but this is on a whole different level.

As the description say this is an All-in-One production solution for Podcasting, Streaming, Music Production and Content Creation. It does so much but in a really simple, tactile way. With the inbuilt processing this has saved me a ton of editing time removing breaths, working on audio in Adobe Audtion to enhance voice and so much more. Also when LIVE Streaming being able to easily control all aspects of audio makes the whole process so much more manageable and enjoyable.


Headphones

If I’m editing, watching YouTube, Netflix etc and anything else other than LIVE video, I use the Sony MDR-7506.

Super comfortable and great sound.

When I’m doing LIVE video ( presenting / zoom etc ) then I use my Apple Aipods Pro 2nd Gen.


Streamdeck XL

This thing is invaluable! 32 keys that you can programme to perfrom any number of taks depending on the software you’re using but it really shines when doing LIVE presentations such as on YouTube.

Streamdeck XL from Elgato


Being able to pre programme buttons to turn cameras on and off, microphones on and off, play video, play trailes, show images, start and stop the broadcast and so on, makes it so much more manageable; it literally is like having a team of people working with you by just pressing a button.

Pen tablet

I used to use Wacom but now I use this Medium Pen Tablet from Xencelabs; reliable, well made, does what it says on the tin 😃

In fact, here’s a video I did for my YouTube Channel about it …


Other Stuff I wouldn’t be without

Apple M2 iPad Pro 12.9”

I use this every single day without fail. So increibly useful … superb for tethering too when using CaptureOne.

Belkin Boost Charge Pro 3-in-1 Wireless Charging Stand

Not only handy because it charges my iPhone, Apple Watch and Airpods, but because it’s a stand I can see the time on my watch and notifications come through on my phone as I’m working. Might not sound like much but having everything in one place and charging for me is just so useful.

So that’s the main kit I’m now using for all my photography, video, live streaming and general day to day.

For other kit that I use I’ve listed pretty much all of it over on my GEAR page.

Anyway, thought I’d give you an update seeing as things have changed a bit over the last few months.

Cheers,
Glyn