Portrait

Classic Portraits with Constant Light

Recently I was back with friends in the studio taking portraits, and this time getting Steve in front of my camera to try out some ideas I’d stumbled across when browsing Pinterest that I thought would be another good excuse to get my L60-B constant light out for.

Pinterest

I’ve used Pinterest for years as a great place for not only finding inspiration by looking at the work of photographers I admire like Annie Leibovitz and Mark Seliger, but also a great tool for looking how other photographers pose their subjects, which lets face it can be awkward at times. 

Finding a balance between what you want but also making the pose look natural and the subject comfortable can be challenging to get right but I’ve always found it a massive help when you can guide your subject on what you’re looking for by showing them a picture.

Anyway, these here are some of the looks and poses I was really interested in …

Model for the Day

Model for the day was my dear friend Steve Healy whom I’ve known for years. 

There was a time when for quite a while we’d not met up because of Steve moving away to Devon but I’m glad to say that when we finally made the move to the South West , we’re now able to meet up fairly regularly to just hangout out and take photographs. This we will certainly be doing more and more of!

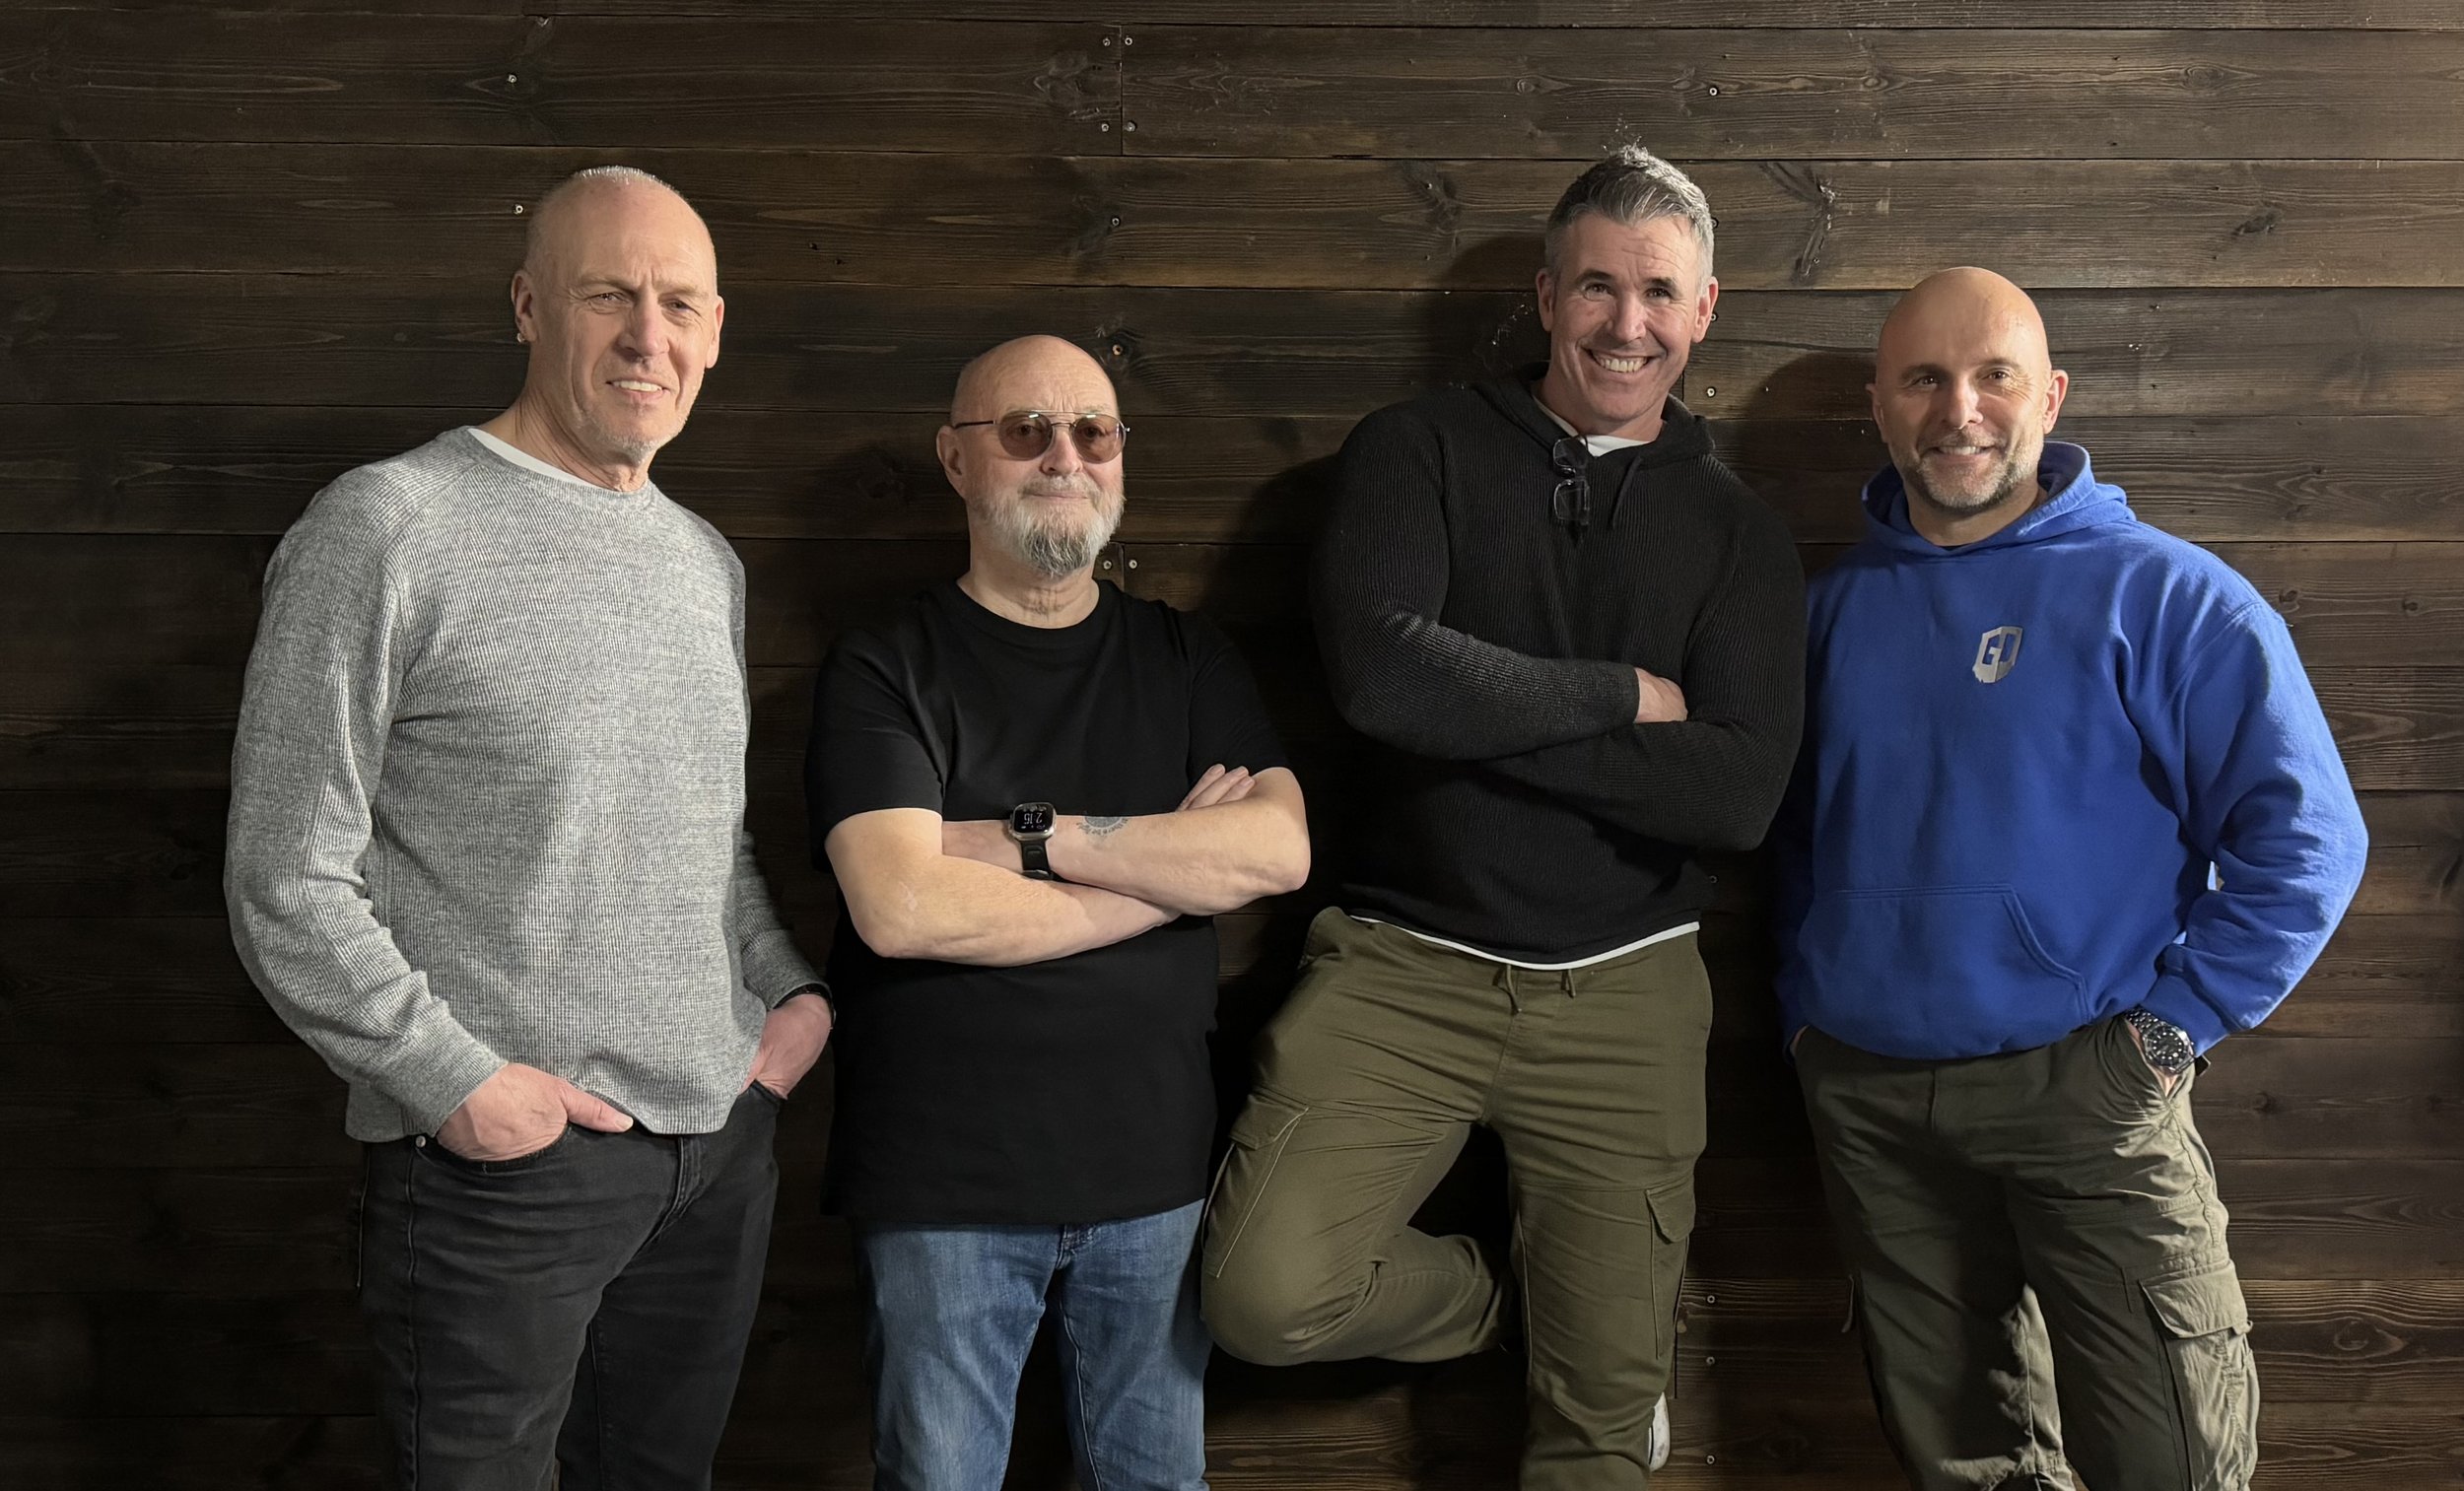
Anywa, Steve drove over to my house in the morning and then we both jumped into my car and headed to South Wales to catch up with the gang; some of my closest friends which to be honest are more like family … Ian Munro and Anthony Crothers.

This was the first time Steve had met up in person with Ian and Anthony even though I’m sure they felt like they knew each other anyway having messaged back and forth many times on social media and also in the chat room during my Sunday LIVE Broadcasts on YouTube. Needless to say … Steve instantly became ‘one of the gang’ 😃

So after a traditional meet up at Costa in Brynmawr, South Wales to fuel up on coffee, we then went to the studio and cracked on …

PORTRAIT 1

So the first portrait I really liked the look of doing was the one inspired by this portrait of Robert De Niro taken by Mark Seliger …

Steve had brought along a dark grey casual suit-type jacket which was ideal. He’d also bought a white shirt to wear underneath but when setting up we all felt that even though you’d only seen a small portion of it, it would be too distracting, so instead Steve kept with the black T-Shirt he was wearing.

BACKGROUND

For this I portrait as it was to be a fairly tight crop of Steve on one side and just a little bit of ‘dead space’ to the left, the 7’ x 5’ background would be plenty big enough and so this was set up with the rear supporting leg shortened so that the background took up less floor space and could be closer to the wall.


LIGHT + MODIFIER

I’ve said it before and I’ll say it again … I absolutely LOVE this light!

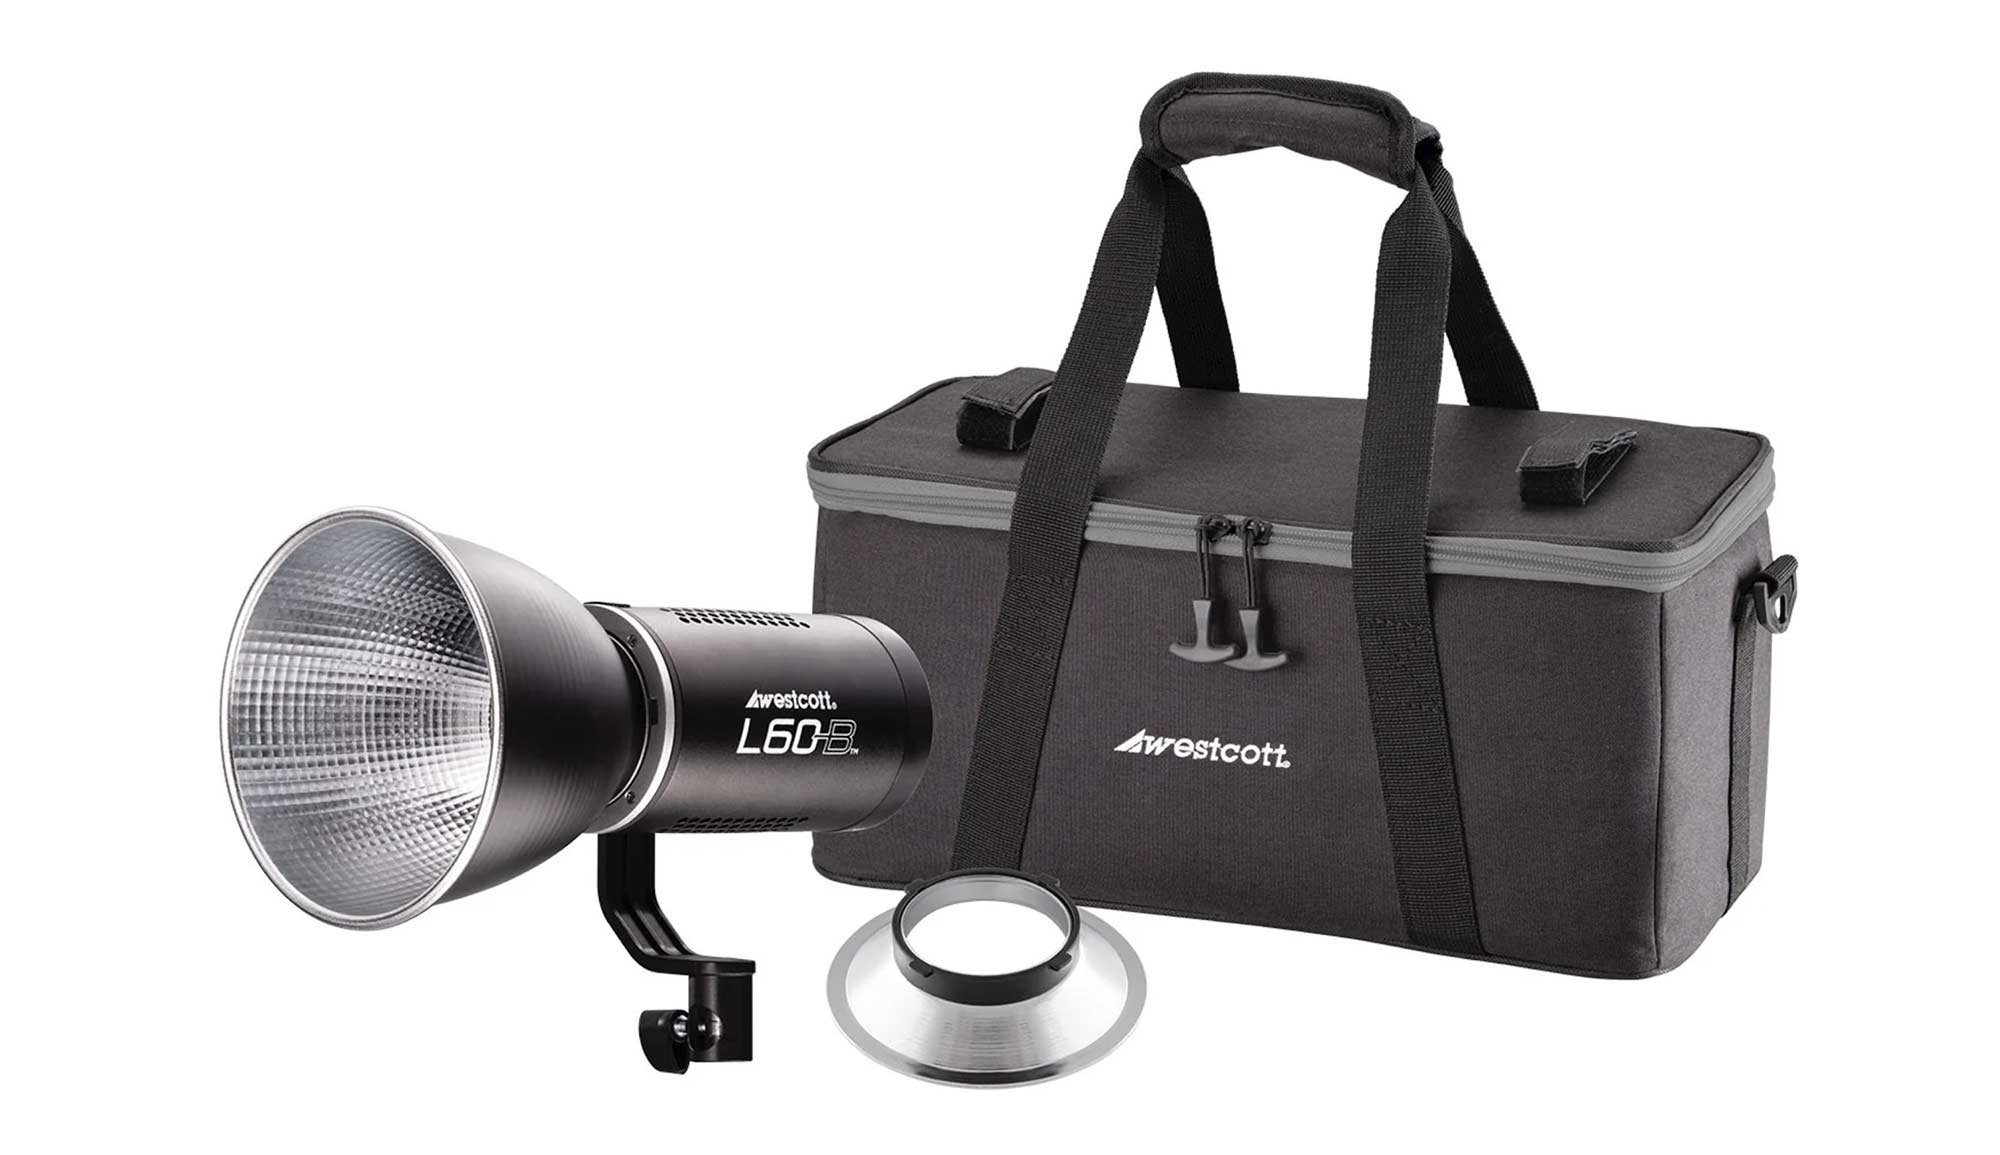
I wouldn’t be exaggerating when I say that positioning the light (L60-B) to get the Rembrandt Lighting Pattern 100% BANG ON took just a few seconds; such is the convenience and ease of doing so when using because … What You See Is What You Get

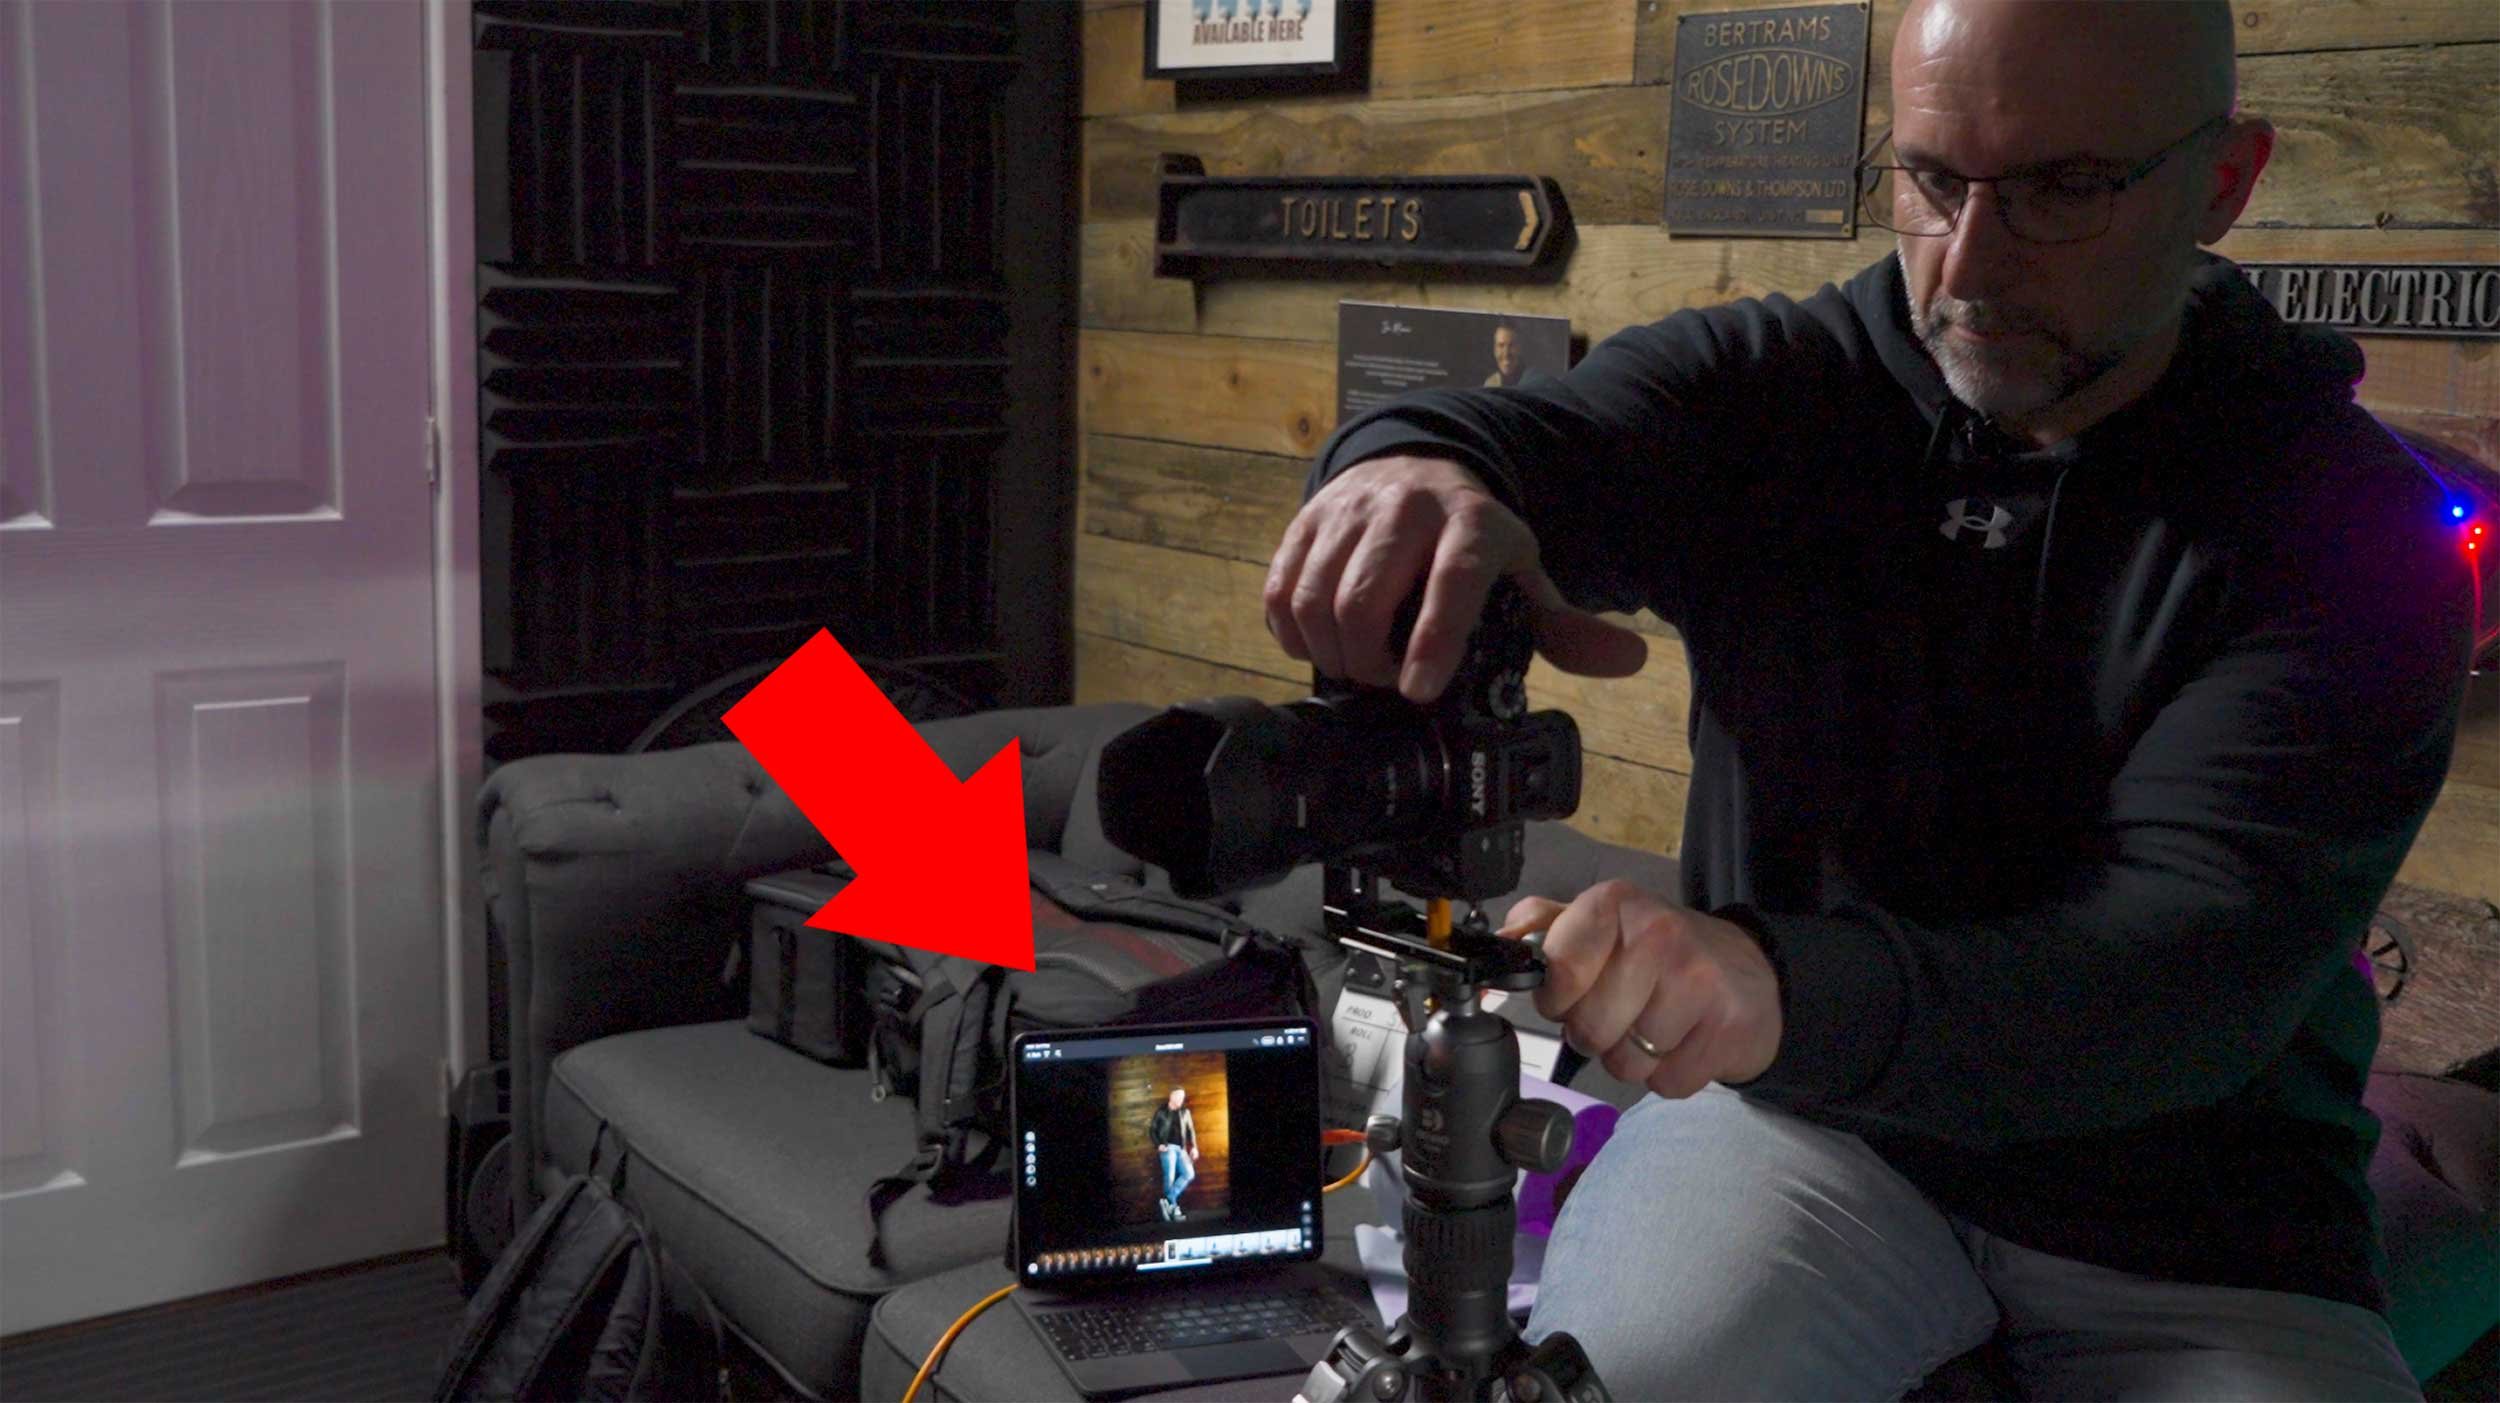
Bottom Left: iPad Pro with Pinterest App open showin the ‘reference’ image

To achieve a quality of light that was neither hard or soft but somewhere in between, and also to minimise the amount of light that would spill onto the background, I opted to use the Westcott 24” Rapid Box Switch Beauty Dish and with the outer diffusion panel fitted.

Westcott 24” Rapid Box Switch Beauty Dish with Outer Diffusion Panel

CAMERA + Lens

  • Sony A7RIV

  • Sony 85mm f/4.0 G Master

CAMERA SETTINGS

  • Aperture: F/4.0

  • Shutter Speed: 1/60sec

  • ISO 1250

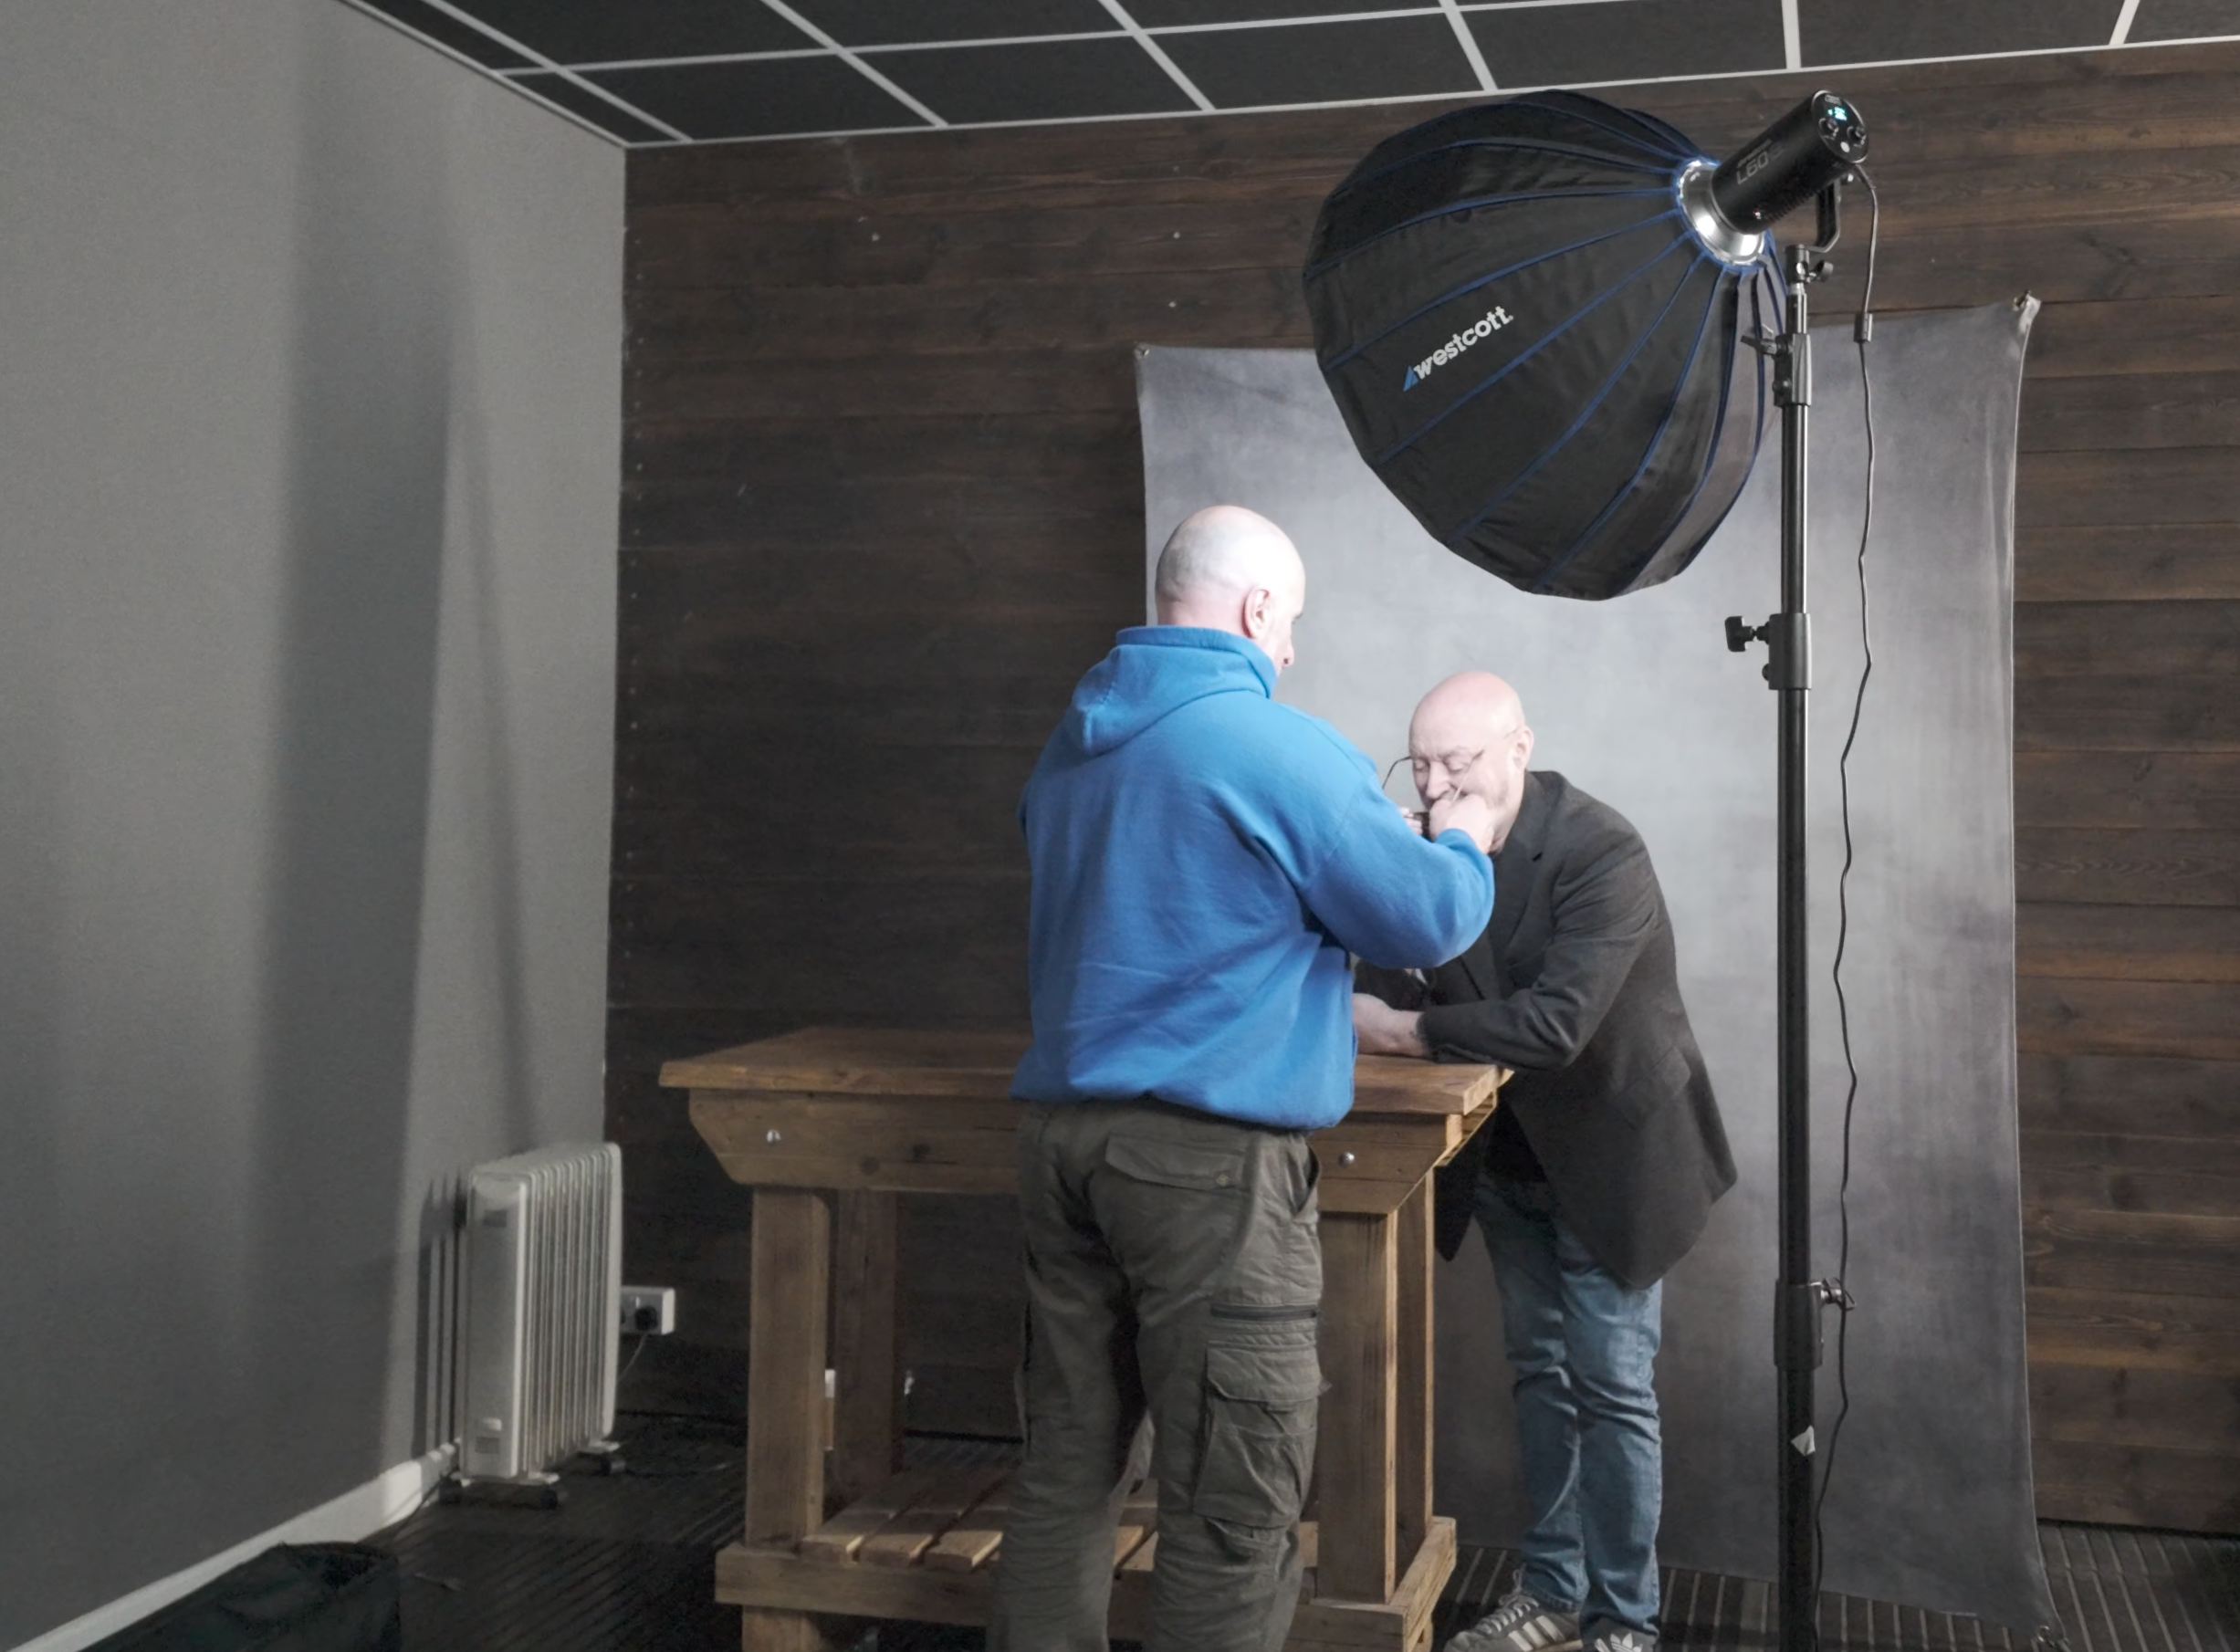
Once set up and with any light in the studio that wasn’t contributing to the portrait turned off, I could then start taking portraits of Steve but what was really useful here was that everyone could see EXACTLY what the shots would be like without having to look at the back of my camera each time or look at my iPad Pro that I was tethering to; again because What You See Is What You Get

Studio lights and ‘any’ lights not contributing to the portrait turned off.

This made it so easy for anyone who wanted to make a suggestion and move in to maybe get Steve to angle himself differently or change the position of a hand.

It just worked and worked so incredibly well, making EVERYONE feel involved.

OUT OF CAMERA

Here’s the out of camera Raw file …

Original Raw file in Adobe Lightroom Classic

FINAL EDIT

Here’s the final retouched image which was worked on using both Lightroom and Photoshop …

Final Retocuhed Portrait

LIGHTROOM CLASSIC and PHOTOSHOP

Here’s a summary of the retouching steps carried out in both Lightroom Classic and Photoshop …

Lightroom

  • Straighten & Crop

  • Colour Correction*

  • Denoise

  • Masking (Enhance eyes - Iris and Pupil only)

*Had to do this manually as ‘somehow’ I forgot to use my Colour Checker Passport … Doh!

Photoshop

  • Clean Up

  • Dodge & Burn

  • 2010

  • Dreamy Glow (20%)

Lightroom

  • Colour (CN16)

  • Color Mixer (Reduce Orange & Red Saturation on Steve’s face)

  • Masking (Radial Gradient to Shape Light)

  • Masking Exposure on Face

  • Add Grain


PORTRAIT 2

For the 2nd portrait of Steve, this was the photograph I used as the initial inspiration / idea …

For this we went with the exact same set up albeit positioning the light camera left this time as opposed to camera right as it was for the first portrait.

Below is what the set up looked like before turning off the lights in the studio that weren’t contributing to the portrait …

Using the single L60-B coming in from high up and angled down produced exactly the lighting that was wanted (below) however I felt that the shadow side of Steve’s head was a touch too dark …

To add a touch more light onto the shadow side of Steve’s head, rather than use a 2nd L60-B we just used a Silver Reflector which also had a white side to it, however between the two surfaces, the silver side gave the best result …


OUT OF CAMERA

Here’s the ‘out of camera’ Raw file …

Out of Camera Raw file in Lightroom Classic

FINAL EDIT

Here’s the final retouched image which was worked on using both Lightroom Classic and Photoshop …

Final Retouched Portrait

lightroom classic and photoshop

Retouching steps in both Lightroom Classic and Photoshop were pretty much the same as in the first portrait, however there was one very definite difference.

When taking the 2nd portrait, we all felt that although Steve sitting on a stool worked, it did make him look a little squashed because of the height of the stool he was sitting on and also how his jacket sat, so we also tried a few shots with Steve standing …

With Steve standing it definitely stopped him looked squashed, however when looking at the images later in Lightroom Classic I was torn because I liked the pose and expression on Steve’s face from the seated shots.

So now in the retouching I was thinking I could either (a) do a head swap or (b) do the opposite of a technique I used to do when photographing physiques … and that’s what I chose to do.

PHOTOSHOP TUTORIAL

Here’s a short video showing exactly what I did in Photoshop to reduce / remove the ‘squashed’ look …

WRAP UP

Following the photo shoot we all the headed over to Abergavenny for what was a delicious bite to eat at The Angel … THANK YOU Steve!

So there you go, all of the steps that I went through from the initial idea, the kit, the set up and the final edit.

As always if you have any questions / comments, please do make use of the section below and I’ll be sure to reply.

Oh and don’t forget, if you’re interested in getting ANY of the Westcott kit including lighting, modifers, backgrounds etc then drop me a line as I’ll be able to give you a Discount Code for 10% OFF

Cheers
Glyn

Constant LED Light Portraits with Sony and iPhone

The more I use the LED Constant Light for Portraits, the more I fall in love with it.

I know I said it before in an earlier post but when you use it, the whole WYSIWYG (What You See Is What You Get) not only makes setting up so much easier and quicker but also every time I use it, the people I photograph say how much more relaxing it is not having a flash go off in their face.

Just over a week ago I was recording some content for the iPhone Photography Conference and thought it would be an interesting comparison just to see how close I could get a photograph I took with my main camera, my Sony A7RIV Mirrorless and my iPhone 15 Pro Max.

Of course I went into this knowing that the iPhone image wouldn’t equal or surpass the quality of my Sony, but just thought it would be interesting to see how far the quality has moved on and do this with a lit Portrait using the constant light … the Westcott L60-B Bi-Colour LED.

THE SET UP

For the lighting. I had originally planned to use just one light, the L60-B, however I couldn’t resist the warm light emitting from the heater that Ian had turned on in the studio. I loved the way it cast a warm glow onto the wood panelling so this was carefully raised off the ground and then became the main light and the L60-B was positioned on the opposite side of Ian further forward and higher up.

The L60-B was given a warmer temperature using the iPhone app which works incredibly well.

As soon as I opened the app it connected to the light and I was able to dial in the power settings, change the temperature and I could even make it perform lighting special effects like lightning, TV and a faulty bulb … but these are obviously for use when doing video.

CAMERA SET UP 

So with my Sony A7RIV on my tripod I used my 55mm Zeiss f/4.0 lens and tethered this into CaptureOne on my iPad, which works an absolute treat!

It’s incredibly easy to set up; you literally plug one end of a USB-C cable into the camera, the other end into the iPad, and with the app open i’st connected and ready to go.

I’m using this all the time now when tethering and what I also love about it is that you can stop and start the monthly subscription whenever you want. The subscription is only £4.49 / month so I tend to look at what I have planned and just restart it for that period, then cancel it again.

The only thing I don’t like which might (I hope) be just down to a setting I’ve missed turning on, but the photographs you take are only stored on the iPad. I only discovered this after the first shoot I did using it. I disconnected the camera and went to check the images on the camera and nothing was there. Only once my heart re-started and I looked on my iPad did I realise where they were 😳


CAMERA SETTINGS

The settings dialled into my camera were …

  • f/4.0

  • 1/60 sec

  • 2000 ISO … which for modern day cameras is nothing

using the iphone

Having taken the portrait with my Sony I then swapped over to my iPhone which was placed on the tripod using the ULANZI ST-27 Phone Mount.

I also attached the 2x Telephoto lens from ReeFlex to the 1x lens on my iPhone using one of their cases that has threads in each of the lens apertures.

The 1x lens is the equivalent of 24mm and is the only lens on the iPhone capable of shooting in ApplePro Raw at 48MP … the highest resolution and largest file my iPhone 15 Pro Max can produce.

With the 2x Telephoto lens attached this made the 1x lens the equivalent of 48mm and did this optically rather than digitally, and so doing everything possible to create the best possible file; not quite 55mm but the closest I could get oto it optically.

iPHONE PRO CAMER APP

To take the photograph with my iPhone I used a Pro Camera App from ReeFlex and called ReeFlex.

This app like most other pro camera apps gives you control over extra settings like Shutter Speed and ISO but it also makes it very clear to see not only what file format you are in but also the resolution.

ReeFlex Pro Camera App usinfg 1x lens in Apple ProRaw at 48MP

However here’s the catch …

If when you’re using the 1x lens in Apple ProRaw at 48MP you make changes to the shutter speed and / or ISO then the file size immediately drops from 48MP to 12MP.

ReeFlex Pro Camera App using 1x lens with Shutter Speed Adjusted

So because of this I opted to leave the iPhone in the AUTO settings which kept the 1x lens in Apple ProRaw at 48MP, and these are the out of camera and out of phone results, with the Sony image on the left and the iPhone image on the right …

Now at this 100% magnification the iPhone file, although different to the Sony file, certainly looks to be holding up.

However, it’s when you zoom in on that iPhone file that things look VERY different …

Look how the file looks soft and slightly out of focus. Look how the file lacks texture and detail in Ian’s skin, his hair and the wood panelling.

Apple ProRaw

This softening appearance to the image is all because of shooting in the supposed highest resolution settings, AppleProRaw at 48MP and that’s because Apple ProRaw isn’t like a traditional Raw file as we know and understand them.

You see Apple ProRaw files do actually receive some processing such as Noise Reduction ( quite al lot ) and Smart HDR, so the file we end up with is also a blend of a number of images at different exposures taken and processed increibly quickly.

So not REALLY a Raw file as you would expect 🤷‍♂️

topaz sharpen ai

Running the file thorugh Topaz Sharpen AI does recover alot of that lost detail as you can see here …

However knowing what Apple ProRaw does to your files does arm you with a bit of knowledge so that you can make the decision to use it or not.

Depending on how serious you are about your iPhone photography you might want to consider shooting in 12MP Raw which Pro Camera apps like Moment and ReeFlex allow you to do …

Naturally we always want the highest resolution file possible but the noise reduction that Apple ProRaw does, might make you reconsider.

12MP Bayer raw files

Currently ALL Raw Long Exposure apps produce 12MP Bayer Raw files and that’s what all of my seascape images are and I’m more than happy with them.

Sure more resolution would be good but until that time, these 12MP Bayer Raw files are very acceptable …

So acceptable in fact that Digitalab even printed one of my iPhone seascapes at 72” on the longest side and it looked incredible …

final retouched portraits

Here though are the final retouched portraits with the Sony file on the left and the iPhone file on the right, and yeah the Sony file is definitely better and that’s to be expected, but looking at the iPhone file the future is going to be VERY interesting indeed!

wrapping up

So more testing to be done which will be interesting as new iOS updates come along and the iPhone 16 later this year.

In the mean time I’m going to carry on taking seascapes with my iPhone because I really enjoy doing them BUT I’ll also be taking them with my Sony too.

As for Portraits I’ll keep taking them with my iPhone but only as an extra bit of fun and experimentation when taking them with my Sony.

Catch you next time
Glyn


FINE ART Storytelling Photography, DOGS and MONT BLANC | Ian Munro

Watch the recording of this LIVE Broadcast as I chat with my great friend Ian munro and go Behind the Scenes of his Photography discussing his process, set building, how he comes up with ideas, lighting kit and more PLUS his latest adventure summiting Mont Blanc …

LINKS MENTIONED IN THE VIDEO:

Ian Munro Website:
https://www.ianmunro.co.uk/

Ian’s YouTube Channel:
https://www.youtube.com/@IanMunroArt

Hope Rescue:
https://www.hoperescue.org.uk/

Ian’s Just Giving Page for Hope Rescue Dogs:
https://www.justgiving.com/page/ian-munro-1706473631317

Adventure Base Mont Blanc:
https://adventurebase.com/adventure/climb-mont-blanc/

Ian’s Photography Inspiration

LETURK: https://www.leturk.com/

Teun Hocks: https://www.artnet.com/artists/teun-hocks/

100 MEGA PIXEL Female Portrait PLUS Retouching in Lightroom and Photoshop (Hasselblad X2D)

Here’s the recording of a recent LIVE Broadcast I hosted over on my YouTube Channel where I went through the lighting and retouchingsteps of a female portrait PLUS likes and dislikes of the cameraa I used … the Hasselbald X2D.

🎬 𝐂𝐎𝐍𝐓𝐄𝐍𝐓𝐒 𝐎𝐅 𝐓𝐇𝐈𝐒 𝐕𝐈𝐃𝐄𝐎

00:00 - Introduction
01:21 - Hasselbald X2D
05:29 - Things I didn't like
11:11 - Lighting the Portrait
15:18 - Lightroom
20:33 - Remove Tool ( Photoshop )
25:10 - Dust & Scratches ( Clean Glasses )
30:42 - Even-Out Skin Tones
36:12 - The 20/10 Technique
39:17 - Dreamy Glow
42:34 - Presets in Lightroom
44:45 - Di Edwards Sees her Portrait
47:19 - Questions

TRY THIS 💥 The INVISIBLE BLACK BACKGROUND (Photography Technique ... UPDATED)

Here's a SIMPLE and VERY EFFECTIVE technique for creating a Black Background behind your subject when you don't have one ... indoors or outdoors using just your camera and one flash!

This is my UPDATED Invisible Black Background Technique v2.0 😃 📷

🎬 𝐂𝐎𝐍𝐓𝐄𝐍𝐓𝐒 𝐎𝐅 𝐓𝐇𝐈𝐒 𝐕𝐈𝐃𝐄𝐎

  • 00:00 - Introduction

  • 00:40 - Kit Needed

  • 00:55 - Shutter Speed Flash

  • 01:31 - High Speed Sync

  • 01:52 - Camera Settings

  • 02:50 - Aperture + Flash

  • 03:37 - Turn on HSS

  • 04:12 - Turn on the Flash

  • 04:46 - Options

  • 05:25 - Recap

  • 06:05 - The Problem with HSS

  • 06:29 - Why not use a Neutral Density (ND) Filter?

  • 07:46 - Dealing with Reflections